Nissan Versa (N17): Center console lower
Removal and Installation
REMOVAL
- Remove center console assembly. Refer to IP "Removal and Installation".
- Remove center console lower.
a. Place front seats in a full rearward position.
b. Remove center console lower clips (A).
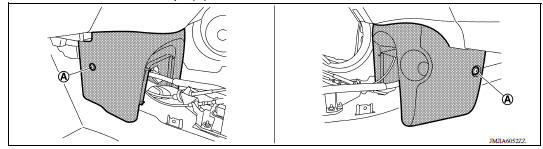
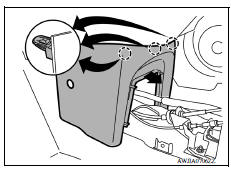
c. Disengage center console lower pawls and remove center console lower.
 : Pawl
INSTALLATION
Installation is in the reverse order of removal.
UNIT DISASSEMBLY AND ASSEMBLY
 Center console assembly
Exploded View 1. M/T console boot (M/T models) 2. Center console assembly Removal and Installation REMOVAL Move shift selector to "N" position (CVT models or A/T models). Remove shift ...
Center console assembly
Exploded View 1. Power socket 2. Center console assembly 3. Center console support 4. USB port and auxiliary jack Disassembly and Assembly DISASSEMBLY Remove the center console assembly. ...
Other materials:
Removal and installation
ECM
Exploded View
1. ECM bracket 2. ECM
: Vehicle front
Removal and Installation
CAUTION: Perform ADDITIONAL SERVICE WHEN REPLACING ECM. Refer to
EC-122, "Work Procedure".
REMOVAL
Remove battery. Refer to PG, "Removal and Installation".
Remove IPDM E/R. Re ...
Side oil seal
Removal and Installation
REMOVAL
Remove front drive shaft from transaxle assembly. Refer to FAX, "Removal
and Installation".
Remove differential side oil seal (1) using suitable tool.
CAUTION:
Do not damage transaxle case and clutch housing.
INSTALLATION
& ...
Categories
- Manuals Home
- Nissan Versa Owners Manual
- Nissan Versa Service Manual
- Video Guides
- Questions & Answers
- External Resources
- Latest Updates
- Most Popular
- Sitemap
- Search the site
- Privacy Policy
- Contact Us

0.005