Nissan Versa (N17): Diagnosis system (audio unit)
Diagnosis Description
The audio unit on board diagnosis performs the functions listed in the table
below: 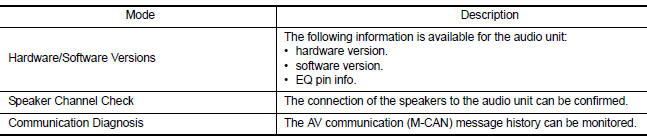
On Board Diagnosis Function
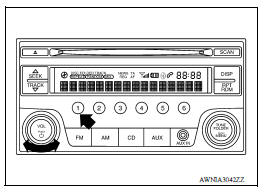
METHOD OF STARTING
Hardware/Software Versions and Speaker Channel Check
1. Turn the ignition ON.
2. Turn the audio system OFF.
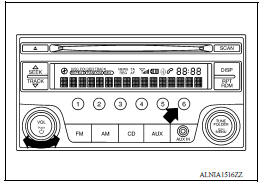
3. While pressing the preset 1 button, turn the volume control dial clockwise or counterclockwise 30 clicks or more.
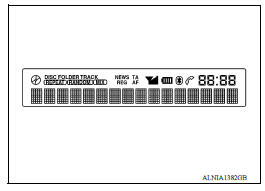
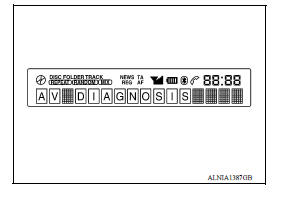
4. Initially, all display segments will be illuminated.
5. To exit hardware/software versions and speaker channel check, turn the ignition OFF.
Communication Diagnosis
1. Turn the ignition ON.
2. Turn the audio system OFF.
3. While pressing the preset 6 button, turn the volume control dial clockwise or counterclockwise 30 clicks or more.
4. Initially, the communication diagnosis mode is displayed.
5. To exit communication diagnosis, turn the ignition OFF.
SELF DIAGNOSIS MODE
Hardware/Software Versions
1. Press the DISP button to enter versions display, and the audio head unit software version is displayed.
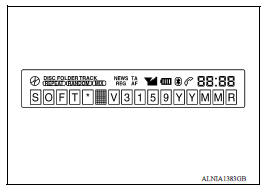
2. With each additional press of the DISP button, the following information is available:
- HARD V###### (hardware version)
- EEP V###### (EEPROM version)
- @@@@ EQ1-4 # (EQ pin info)
If an EQ error is present, INVALID EQ is displayed
3. Hold the DISP button down to return to all display segments screen.
Speaker Channel Check
1. Press the RPT/DRM button to enter speaker channel check, and the front left tweeter (front tweeter LH) is displayed.
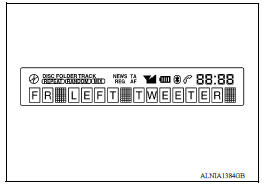
2. With each additional press of the RPT/DRM button, the following information is available:
- FR RIGHT TWEETER (front tweeter RH)
- FR RIGHT (front door speaker RH)
- RR RIGHT (rear speaker RH)
- RR LEFT (rear speaker LH)
- FR LEFT (front door speaker LH)
3. Hold the RPT/DRM button down to return to all display segments screen.
Communication Diagnosis
1. Press the DISP button, and the M-CAN message transmission error history screen is displayed.
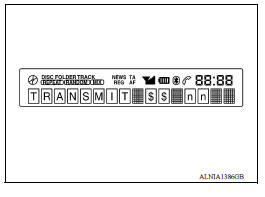
2. Press the DISP button again, and the TEL $$ nn (CMF message reception error history from M-CAN TEL) screen is displayed.
3. Press the DISP button again, and the TROUBLE DEL. (deletion of M-CAN message communication history) screen is displayed. To retain the M-CAN message communication history and return to the communication diagnosis mode screen, press the DISP button.
4. To proceed to the M-CAN message communication history deletion screen, press the SEEK/TRACK button. The REC DEL-NO? (selection of M-CAN message communication history deletion) screen is displayed.
To cancel M-CAN message communication history deletion, wait 6 seconds and you
will be
returned to the TROUBLE DEL. (deletion of M-CAN message communication history)
screen. To proceed
with M-CAN message communication history deletion, press the SEEK/TRACK  button
again.
button
again.
5. The REC DEL-YES?@ (selection of M-CAN message communication history deletion) screen is displayed.
To cancel M-CAN message communication history deletion, press the SEEK/TRACK  button
and you will be returned to the REC DEL-NO? (selection of M-CAN message
communication history deletion)
screen. To proceed with M-CAN message communication history deletion, wait 6
seconds and the
communication history deletion will be executed. After the communication history
deletion has been executed,
you will be returned to the TROUBLE DEL. (deletion of M-CAN message
communication history)
screen. To return to the communication diagnosis mode screen, press the DISP
button.
button
and you will be returned to the REC DEL-NO? (selection of M-CAN message
communication history deletion)
screen. To proceed with M-CAN message communication history deletion, wait 6
seconds and the
communication history deletion will be executed. After the communication history
deletion has been executed,
you will be returned to the TROUBLE DEL. (deletion of M-CAN message
communication history)
screen. To return to the communication diagnosis mode screen, press the DISP
button.
 System
System Diagram System Description AUDIO SYSTEM The audio system consists of the following components Audio unit Front door speakers Rear door speakers Steering wheel audio control sw ...
Diagnosis system (bluetooth control
unit)
Diagnosis Description The Bluetooth control unit has two diagnostic checks. The first diagnostic check is performed automatically every ignition cycle during control unit initialization. The sec ...
Other materials:
Parking brake
WARNING
Be sure the parking brake is fully released
before driving. Failure to do so
can cause brake failure and lead to an
accident.
Do not release the parking brake from
outside the vehicle.
Do not use the shift lever in place of the
parking brake. When parking, be sure
the par ...
EVAP canister vent control valve
Exploded View
1. EVAP canister 2. O-ring 3. EVAP canister vent control valve
4. EVAP canister vent control valve hose
Removal and Installation
NOTE:
The EVAP canister vent control valve can be removed without removing the EVAP
canister.
REMOVAL
Remove the EVAP canister protector cov ...
Categories
- Manuals Home
- Nissan Versa Owners Manual
- Nissan Versa Service Manual
- Video Guides
- Questions & Answers
- External Resources
- Latest Updates
- Most Popular
- Sitemap
- Search the site
- Privacy Policy
- Contact Us

0.0055