Nissan Versa (N17): Outside handle
OUTSIDE HANDLE : Removal and Installation
REMOVAL
1. Fully close the front door glass.
2. Remove front door finisher. Refer to INT "Removal and Installation".
3. Remove sealing screen.
NOTE: Cut the butyl tape so that some parts of the butyl tape remain on the sealing screen, if the sealing screen is reused.
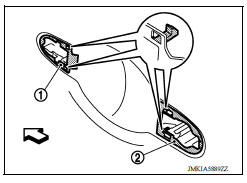
4. For drivers side only, open rod holder (1) by pulling downward and separate key rod (3) from door lock assembly (2).
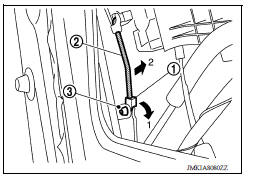
5. Disengage outside handle cable (1) from cable clip (2).
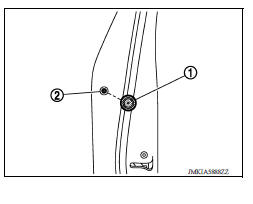
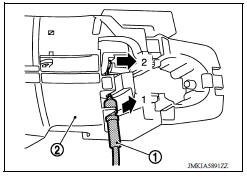
6. Remove door side grommet (1), and loosen bolt from grommet hole (2).
7. While pulling outside handle, remove door key cylinder assembly (LH side) or outside handle escutcheon (RH side).
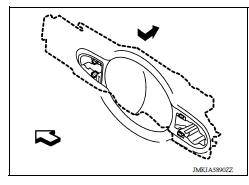
8. While pulling outside handle (1), slide toward rear of vehicle to remove outside handle.

9. Remove front gasket (1) and rear gasket (2).
 Front
Front
10. Slide outside handle bracket toward rear of vehicle to remove.
 Front
Front
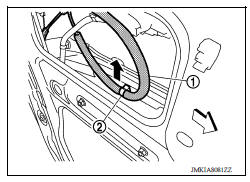
11. Disconnect outside handle cable (1) from outside handle bracket (2) as shown.
INSTALLATION
Installation is in the reverse order of removal.
CAUTION:
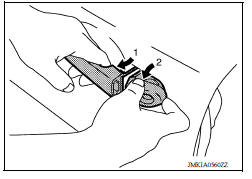
- When installing door key cylinder rod on the LH front door, be sure to rotate door key cylinder rod holder until a click is felt.
- Check that door lock cables are normally engaged with inside handle and outside handle.
- After installation, check door open/close, and lock/unlock operation.
REAR DOOR LOCK
Exploded View
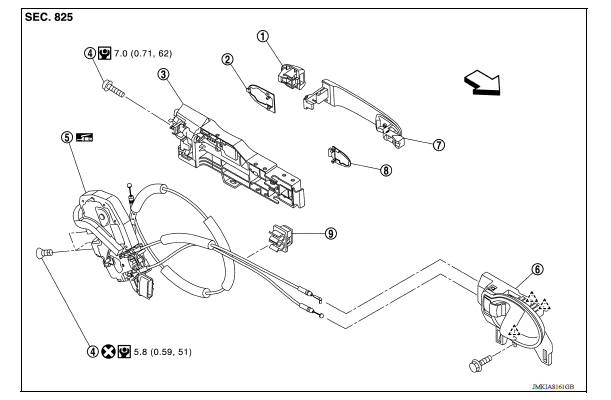
1. Outside handle escutcheon 2. Rear gasket 3. Outside handle bracket
4. Bolt 5. Door lock assembly 6. Inside handle
7. Outside handle 8. Front gasket 9. Clip
 Pawl
Pawl  Front
Front
 Inside handle
INSIDE HANDLE : Removal and Installation REMOVAL 1. Remove front door finisher. Refer to INT "Removal and Installation". 2. Remove upper side of sealing screen. NOTE: Cut the butyl ta ...
Door lock
DOOR LOCK : Removal and Installation REMOVAL 1. Remove inside handle. Refer to DLK "INSIDE HANDLE : Removal and Installation". 2. Remove outside handle. Refer to DLK "OUTSIDE HANDL ...
Other materials:
4-speed automatic transmission fluid (ATF) (if so equipped)
When checking or replacement of automatic
transmission fluid is required, it is recommended
that you visit a NISSAN dealer for servicing.
WARNING
When the engine is running, keep
hands, jewelry and clothing away from
any moving parts such as the cooling
fan and drive belts
Automatic t ...
P0733 3GR Incorrect ratio
Description
This malfunction is detected when the A/T does not shift into 3GR position as
instructed by TCM. This is not
only caused by electrical malfunction (circuits open or shorted) but by
mechanical malfunction such as control
valve sticking, improper solenoid valve operation, etc.
DTC ...
Categories
- Manuals Home
- Nissan Versa Owners Manual
- Nissan Versa Service Manual
- Video Guides
- Questions & Answers
- External Resources
- Latest Updates
- Most Popular
- Sitemap
- Search the site
- Privacy Policy
- Contact Us

0.0092