Nissan Versa (N17): AV Control unit
Removal and Installation
REMOVAL
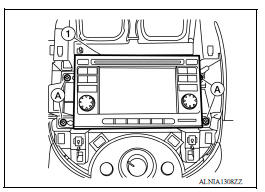
1. Remove cluster lid C. Refer to IP "Removal and Installation".
2. Remove the audio unit screws (A).
3. Pull the audio unit (1) out.
4. Disconnect the harness connectors from the audio unit and remove.
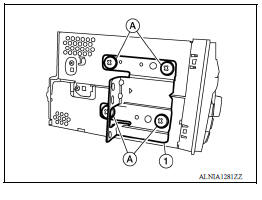
5. Remove the audio unit bracket screws (A) and the audio unit bracket (1) from each side of the audio unit (if necessary).
INSTALLATION
Installation is in the reverse order of removal.
 Normal operating condition
Description RELATED TO NOISE The majority of the audio concerns are the result of outside causes (bad CD, electromagnetic interference, etc.). The following noise results from variations in ...
USB Connector
Removal and Installation REMOVAL 1. Remove the center console assembly. Refer to IP "Removal and Installation". 2. Release the pawl from the back of the center console to remove the ...
Other materials:
Engine control system symptoms
Symptom Table
SYSTEM - BASIC ENGINE CONTROL SYSTEM
1 - 6: The numbers refer to the order of inspection.
(continued on next table)
SYSTEM - ENGINE MECHANICAL & OTHER
1 - 6: The numbers refer to the order of inspection. ...
P0973 Shift solenoid A
DTC Logic
DTC DETECTION LOGIC
DTC
Trouble diagnosis name
DTC detection condition
Possible causes
P0973
Shift Solenoid "A" Control Circuit
Low
The following diagnosis conditions
are met, and the TCM select
switch ON-OFF solenoid
valve monitor value is ON c ...
Categories
- Manuals Home
- Nissan Versa Owners Manual
- Nissan Versa Service Manual
- Video Guides
- Questions & Answers
- External Resources
- Latest Updates
- Most Popular
- Sitemap
- Search the site
- Privacy Policy
- Contact Us

0.0045