Nissan Versa (N17): USB Connector
Removal and Installation
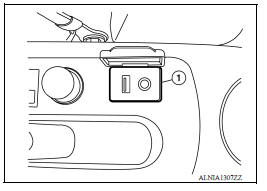
REMOVAL
1. Remove the center console assembly. Refer to IP "Removal and Installation".
2. Release the pawl from the back of the center console to remove the USB harness connector (1) using a suitable tool.
3. Disconnect the harness connector from the USB connector and remove.
INSTALLATION
Installation is in the reverse order of removal.
 AV Control unit
Removal and Installation REMOVAL 1. Remove cluster lid C. Refer to IP "Removal and Installation". 2. Remove the audio unit screws (A). 3. Pull the audio unit (1) out. 4. Disconnect the ...
Front door speaker
Removal and Installation REMOVAL 1. Remove the front door finisher. Refer to INT "Removal and Installation". 2. Remove the front door speaker screws (A). 3. Disconnect the harness connec ...
Other materials:
Rear oil seal
REAR OIL SEAL : Removal and Installation
REMOVAL
Remove transaxle assembly.
Remove clutch cover and clutch disk (M/T models).
Remove flywheel (M/T models) or drive plate (A/T or CVT models).
Remove rear oil seal with a suitable tool.
CAUTION:
Be careful not to damage crankshaft an ...
U0101 can comm circuit
Description
CAN (Controller Area Network) is a serial communication line for real time
application. It is an onvehicle multiplex
communication line with high data communication speed and excellent error
detection ability. Many electronic
control units are equipped onto a vehicle, and each con ...
Categories
- Manuals Home
- Nissan Versa Owners Manual
- Nissan Versa Service Manual
- Video Guides
- Questions & Answers
- External Resources
- Latest Updates
- Most Popular
- Sitemap
- Search the site
- Privacy Policy
- Contact Us

0.0046