
Nissan Versa (N17): Rear bumper
Exploded View
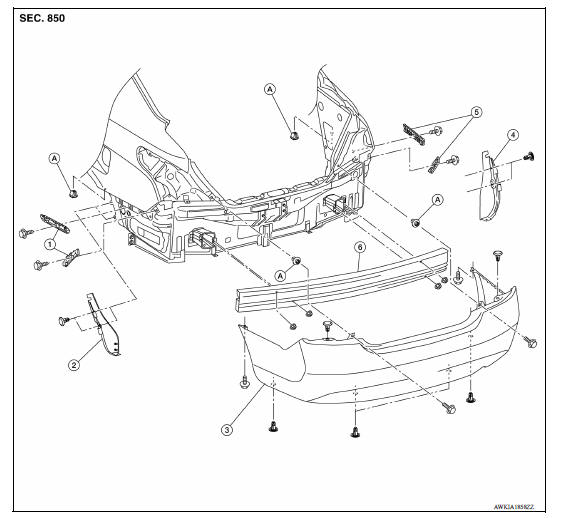
1. Rear bumper side brackets (LH) 2. Rear bumper closing (LH) 3. Rear bumper fascia 4. Rear bumper closing (RH) 5. Rear bumper side brackets (RH) 6. Rear bumper reinforcement A. Screw grommet
Removal and Installation
REMOVAL
CAUTION: Bumper fascia is made of resin. Do not apply strong force to it, and be careful to prevent contact with oil.
1. Remove rear combination lamps (LH/RH). Refer to EXL "Removal and Installation".
2. Remove clips (A) and screws (B) (LH/RH).
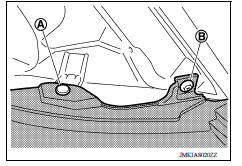
3. Remove rear bumper fascia lower clips.
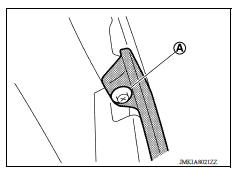
4. Remove rear bumper fascia end screws (A).
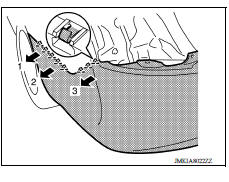
5. Pull rear bumper fascia away as shown by the arrows in the illustration and then disengage the rear bumper fascia from rear bumper side brackets (LH/RH).
 Pawl
Pawl
6. Remove rear bumper fascia.
CAUTION: When removing bumper fascia assembly, two people are required to avoid damaging.
7. Remove the following parts after removing rear bumper fascia. Rear bumper side brackets (LH/RH)
8. Remove rear bumper reinforcement nuts and rear bumper reinforcement.
9. Remove rear bumper closing clips and rear bumper closings (LH/RH).
INSTALLATION
Installation is in the reverse order of removal.
NOTE:
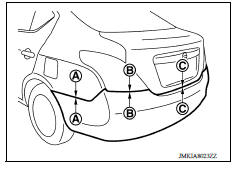
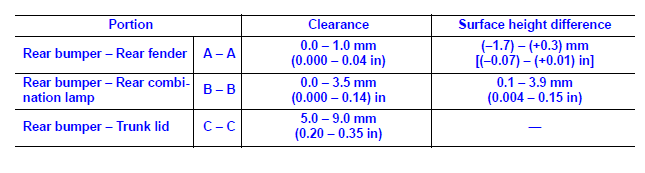
- The following table shows the specified values for checking normal installation specifications.
- Fitting adjustment cannot be performed.
 Under cover
Exploded View 1. Front bumper side bracket (RH) 2. Front bumper reinforcement 3. Front bumper energy absorber 4. Front bumper fascia finisher (RH) (If equipped) 5. Front bumper fascia 6. F ...
Front grille
Exploded View 1. Front grille 2. Front emblem Pawl Removal and Installation REMOVAL 1. Remove front bumper fascia. Refer to EXT "Removal and Installation". 2. Remove front grill ...
Other materials:
EVAP canister
Exploded View
1. EVAP control system pressure sensor 2. O-ring 3. EVAP canister
4. Hose clamp 5. EVAP canister purge hose 6. EVAP vent line
7. O-ring 8. EVAP canister vent control valve 9. EVAP canister vent control
valve
hose
A. Mount to vehicle bracket
Removal and Installation
NOTE: ...
Clutch master cylinder
Exploded View
1. Reservoir hose 2. Master cylinder
Removal and Installation
CAUTION:
Do not spill clutch fluid onto painted surfaces. If fluid spills,
wipe up immediately and wash the
affected area with water.
Do not disassemble clutch master cylinder.
NOTE:
When removing compo ...
Categories
- Manuals Home
- Nissan Versa Owners Manual
- Nissan Versa Service Manual
- Video Guides
- Questions & Answers
- External Resources
- Latest Updates
- Most Popular
- Sitemap
- Search the site
- Privacy Policy
- Contact Us

0.0072