Nissan Versa (N17): Door check link
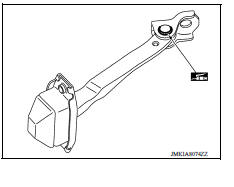
DOOR CHECK LINK : Removal and Installation
REMOVAL
- Fully close the front door window.
- Remove front door finisher. Refer to INT "Removal and Installation".
- Remove front door speaker bolts.
- Disconnect harness connector from front door speaker and remove.
- Remove door check link bolt from body.
- Remove door check link bolts on door panel.
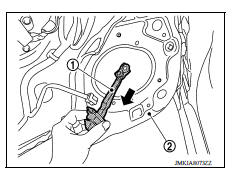
- Remove door check link (1) through the hole in door panel (2).
INSTALLATION
Installation is in the reverse order of removal.
CAUTION:
- After installation, check rear door open/close, lock/unlock operation.
- Check door check link rotating point for poor lubrication. If necessary, apply a multi-purpose grease.
REAR DOOR
Exploded View
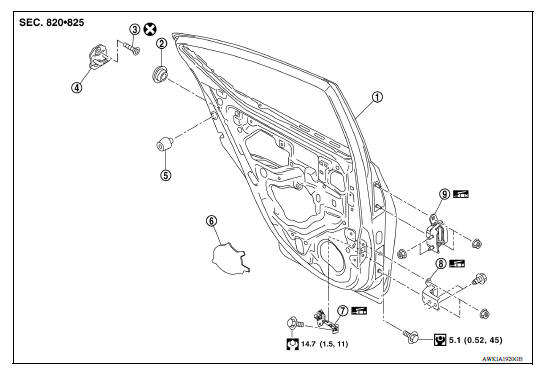
1. Rear door panel 2. Grommet 3. Striker bolt 4. Door striker 5. Bumper rubber 6. Sealing screen (lower) (without door speaker) 7. Door check link 8. Door hinge (lower) 9. Door hinge (upper)
 Door hinge
DOOR HINGE : Removal and Installation REMOVAL CAUTION: Use two people when removing or installing front door due to its heavy weight When removing and installing front door assembly, supp ...

Other materials:
RearView Monitor (if so equipped)
1. CAMERA button (models with navigation)
WARNING
Failure to follow the warnings and instructions
for proper use of the Rear-
View Monitor system could result in serious
injury or death.
RearView Monitor is a convenience feature
and is not a substitute for proper
backing. Always ...
P073E Unable to engage r range
Description
This malfunction is detected when the A/T does not shift into reverse
position as instructed by TCM. This is not
only caused by electrical malfunction (circuits open or shorted) but by
mechanical malfunction such as control
valve sticking, improper solenoid valve operation, etc
D ...
Categories
- Manuals Home
- Nissan Versa Owners Manual
- Nissan Versa Service Manual
- Video Guides
- Questions & Answers
- External Resources
- Latest Updates
- Most Popular
- Sitemap
- Search the site
- Privacy Policy
- Contact Us

0.0059