Nissan Versa (N17): Headlight and turn signal switch
Headlight control switch
Type A (if so equipped)
Lighting
- Rotate the switch to the
 position, and
the front parking, tail, license plate, and instrument
panel lights will come on.
position, and
the front parking, tail, license plate, and instrument
panel lights will come on. - Rotate the switch to the
 position, and
the headlights will come on and all the other
lights remain on.
position, and
the headlights will come on and all the other
lights remain on.
Type B (if so equipped)
CAUTION
Use the headlights with the engine running to avoid discharging the vehicle battery.
Headlight beam select
- To select the high beam function, push the
lever forward. The high beam lights come on
and the
 light illuminates.
 - Pull the lever back to select the low beam.
- Pulling and releasing the lever flashes the headlight high beams on and off.
Battery saver system
If the ignition switch is placed in the OFF position
while the headlight switch is in the  or
or  position, the headlights will
turn off after
a period of time.
position, the headlights will
turn off after
a period of time.
CAUTION
Even though the battery saver feature automatically turns off the headlights after a period of time, you should turn the headlight switch to the OFF position when the engine is not running to avoid discharging the vehicle battery.
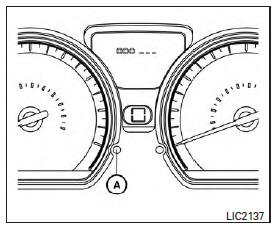
Instrument brightness control
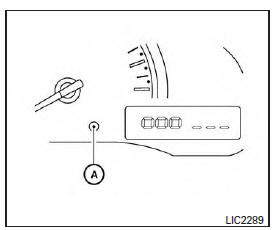
Type A (if so equipped)
The instrument brightness control operates when
the headlight control switch is in the
 or
or  position.
Type A: Turn the control A to adjust the brightness of instrument panel lights when driving at night.
Type B: Press the control A to adjust the brightness of instrument panel lights when driving at night.
Type B (if so equipped)
Turn signal switch
Turn signal
- Move the lever up or down to signal the turning direction. When the turn is completed, the turn signal cancels automatically.
Lane change signal
- Move the lever up or down until the turn signal begins to flash, but the lever does not latch, to signal a lane change. Hold the lever until the lane change is completed.
Move the lever up or down until the turn signal begins to flash, but the lever does not latch, and release the lever. The turn signal will automatically flash three times.
Choose the appropriate method to signal a lane change based on road and traffic conditions.
Fog light switch (if so equipped)
To turn the fog lights on, turn the headlight switch
to the  position, then turn the fog
light
switch to the
position, then turn the fog
light
switch to the  position.
To turn the fog lights off, turn the fog light switch to the OFF position.
The headlights must be on and the low beams selected for the fog lights to operate. The fog lights automatically turn off when the high beam headlights are selected.
 Rear window defroster switch
To defrost the rear window glass, start the engine and push the rear window defroster switch on. The rear window defroster indicator light on the switch comes on. Push the switch again to tur ...
Horn
To sound the horn, push the center pad area of the steering wheel. WARNING Do not disassemble the horn. Doing so could affect proper operation of the supplemental front air bag system. Tamperin ...
Other materials:
Description
Engine Cooling System
M/T models
CVT and A/T models
Engine Cooling System Schematic
M/T models
CVT and A/T models
OVERHEATING CAUSE ANALYSIS
Troubleshooting Chart
Symptom
Check items
Cooling system
parts
malfunction
Poor heat transfer
...
P0506 ISC system
Description
The ECM controls the engine idle speed to a specified level through the fine
adjustment of the air, which is let
into the intake manifold, by operating the electric throttle control actuator.
The operating of the throttle valve is
varied to allow for optimum control of the engine ...
Categories
- Manuals Home
- Nissan Versa Owners Manual
- Nissan Versa Service Manual
- Video Guides
- Questions & Answers
- External Resources
- Latest Updates
- Most Popular
- Sitemap
- Search the site
- Privacy Policy
- Contact Us

0.0062