Nissan Versa (N17): Trunk rear plate
TRUNK REAR PLATE : Removal and Installation
REMOVAL
- Fully open trunk lid.
- Remove trunk floor carpet.
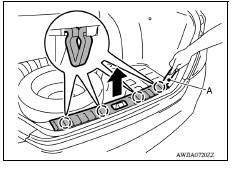
- Remove trunk rear plate clips (A).
4. Release trunk rear plate pawls using a suitable tool (A) and remove trunk rear plate as shown.
INSTALLATION
Installation is in the reverse order of removal.
CAUTION: When installing trunk rear plate, make sure that clips are securely pressed into body holes.
TRUNK FRONT FINISHER
TRUNK FRONT FINISHER : Removal and Installation
REMOVAL
- Fully open trunk lid.
- Remove trunk floor carpet.
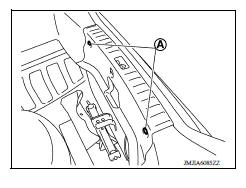
- Remove trunk front finisher clips (A) and trunk front finisher.
INSTALLATION
Installation is in the reverse order of removal.
CAUTION: When installing trunk front finisher, make sure that clips are securely pressed into body holes.
TRUNK SIDE FINISHER
TRUNK SIDE FINISHER : Removal and Installation
REMOVAL
- Remove trunk rear plate. Refer to INT "TRUNK REAR PLATE : Removal and Installation".
- Remove trunk front finisher. Refer to INT "TRUNK FRONT FINISHER : Removal and Installation".
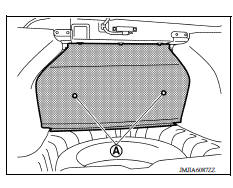
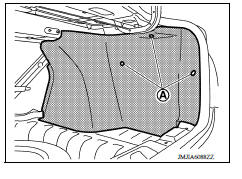
- Remove trunk side finisher clips (A) and trunk side finisher.
INSTALLATION
Installation is in the reverse order of removal.
CAUTION: Make sure the rear end of trunk side finisher is positioned behind the trunk weatherstrip.
 Headlining
Exploded View 1. Headlining assembly 2. Sun visor assembly (RH) 3. Sun visor assembly (RH) 4. Map lamp (if equipped) 5. Sun visor holder (LH) 6. Sun visor assembly (LH) 7. Microphone finisher ...
Trunk lid trim
Exploded View 1. Trunk lid assembly 2. Trunk lid finisher Removal and Installation REMOVAL Fully open trunk lid. Remove emergency release handle. Refer to DLK "EMERGENCY LEVER : Re ...
Other materials:
Service data and specifications
(SDS)
General Specifications
Engine type
HR16DE
Type of clutch control
Hydraulic
Clutch disc
Facing size (Outer dia. × Inner dia. × Thickness)
200 × 140 × 3.1 (7.87 × 5.51 × 0.122)
Recommended clutch fluid
Refer to M ...
Passenger air bag module
Exploded View
1. Passenger air bag module 2. Instrument panel assembly
Pawl
Removal and Installation
WARNING:
Before servicing, turn ignition switch OFF, disconnect both the
battery negative and positive terminals,
then wait at least three minutes.
Always work from the side of ai ...
Categories
- Manuals Home
- Nissan Versa Owners Manual
- Nissan Versa Service Manual
- Video Guides
- Questions & Answers
- External Resources
- Latest Updates
- Most Popular
- Sitemap
- Search the site
- Privacy Policy
- Contact Us

0.0068