Nissan Versa (N17): Corrosion protection
Description
To provide improved corrosion prevention, the following anti-corrosive measures have been implemented in NISSAN production plants. When repairing or replacing body panels, it is necessary to use the same anti-corrosive measures.
Anti-Corrosive Precoated Steel (Galvannealed Steel)
To improve repairability and corrosion resistance, a new type of anticorrosive precoated steel sheet has been adopted replacing conventional zinc-coated steel sheet.
Galvannealed steel is electroplated and heated to form Zinc-iron alloy, which provides excellent and long term corrosion resistance with cationic electrodeposition primer.
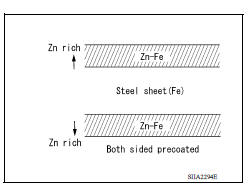
Nissan Genuine Service Parts are fabricated from galvannealed steel. Therefore, it is recommended that GENUINE NISSAN PARTS or equivalent be used for panel replacement to maintain the anti-corrosive performance built into the vehicle at the factory.
Phosphate Coating Treatment and Cationic Electrodeposition Primer
A phosphate coating treatment and a cationic electrodeposition primer, which provide excellent corrosion protection, are employed on all body components.
CAUTION: Confine paint removal during welding operations to an absolute minimum.
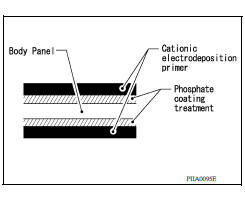
Nissan Genuine Service Parts are also treated in the same manner. Therefore, it is recommended that GENUINE NISSAN PARTS or equivalent be used for panel replacement to maintain anti-corrosive performance built into the vehicle at the factory.
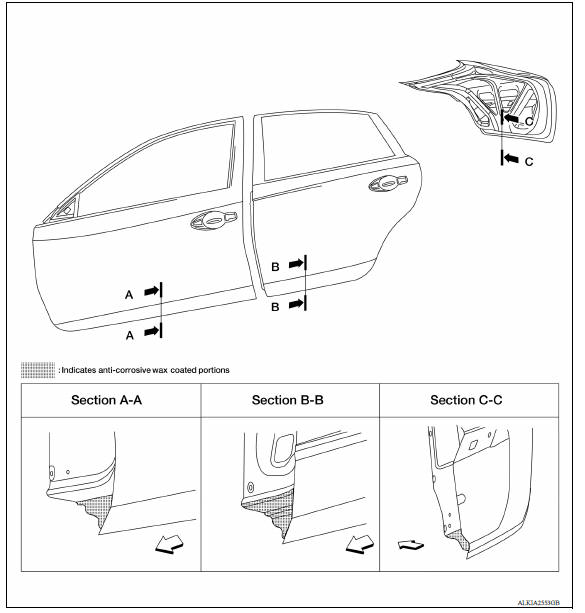
Anti-Corrosive Wax
To improve corrosion resistance, anti-corrosive wax is applied inside the body sill and inside other closed sections.
Accordingly, when replacing these parts, be sure to apply anti-corrosive wax to the appropriate areas of the new parts. Select an excellent anti-corrosive wax which will penetrate after application and has a long shelf life.
 Front
Front
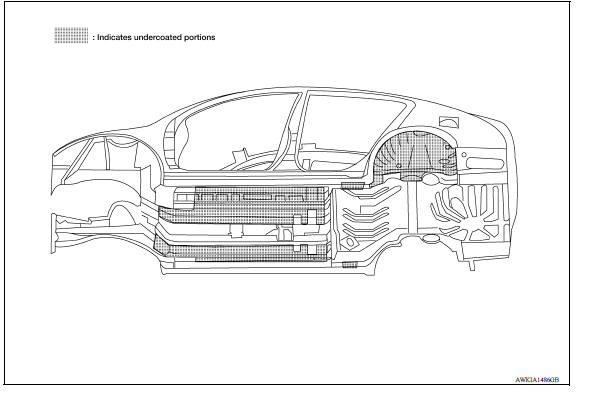
Undercoating
The underside of the floor and wheelhouse are undercoated to prevent rust, vibration, noise and stone chipping.
Therefore, when such a panel is replaced or repaired, apply undercoating to that part. Use an undercoating which is rust preventive, soundproof, vibration-proof, shock-resistant, adhesive, and durable.
Precautions in Undercoating
1. Do not apply undercoating to any place unless specified (such as the areas above the muffler and three way catalyst which are subjected to heat).
2. Do not undercoat the exhaust pipe or other parts which become hot.
3. Do not undercoat rotating parts.
4. Apply bitumen wax after applying undercoating.
5. After putting seal on the vehicle, put undercoating on it.
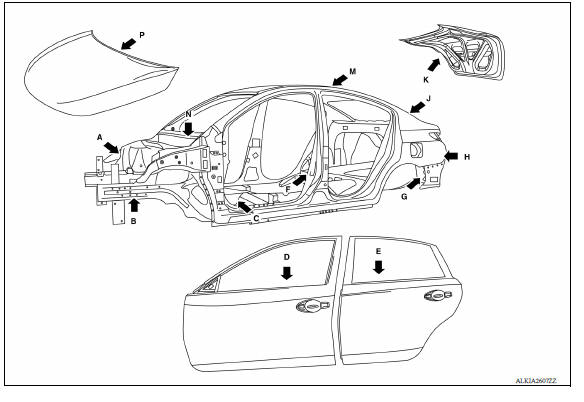
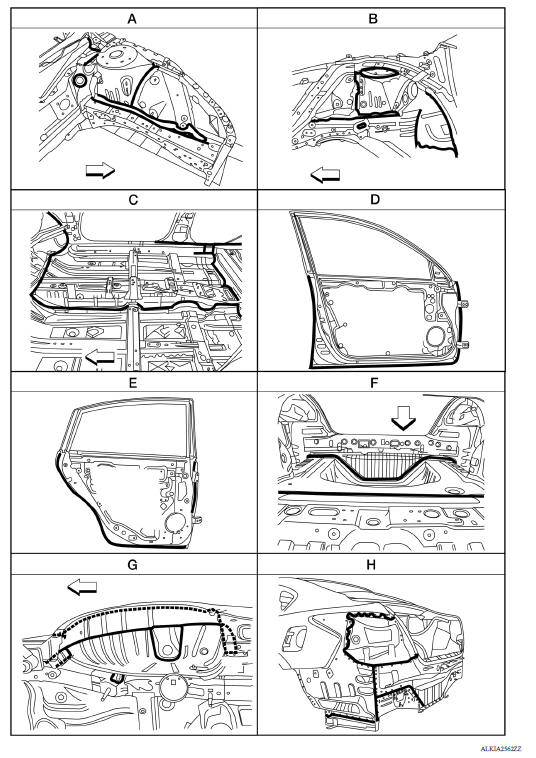
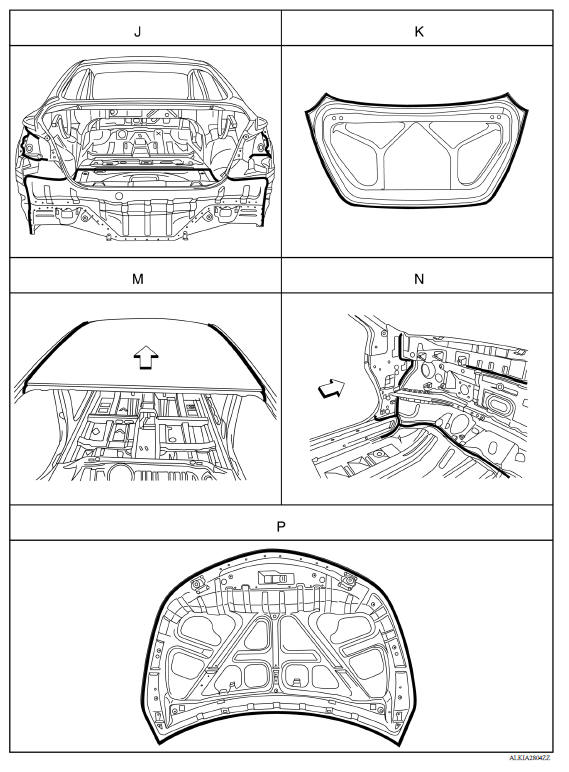
BODY SEALING
Description
The following figure shows the areas which are sealed at the factory. Sealant which has been applied to these areas should be smooth and free from cuts or gaps. Care should be taken not to apply an excess amount of sealant and not to allow other unaffected parts to come into contact with the sealant.
 Repairing material
Foam Repair During factory assembly, foam insulators are installed in certain body panels and locations around the vehicle. Use the following procedure(s) to replace any factory-installed foam ...
Replacement operations
Description This section is prepared for technicians who have attained a high level of skill and experience in repairing collision- damaged vehicles and also use modern service tools and equipme ...
Other materials:
Main power supply and ground circuit
Diagnosis Procedure
1.CHECK TCM POWER CIRCUIT 1
Turn the ignition switch OFF.
Disconnect the TCM connector.
Check the voltage between the TCM harness connector terminals and
ground.
Is the inspection result normal?
YES >> GO TO 2.
NO >> GO TO 4.
2.CHECK TCM POWER ...
U0073 Communication bus A off
Description
CAN (Controller Area Network) is a serial communication line for real-time
application. It is an on-vehicle multiplex
communication line with high data communication speed and excellent malfunction
detection ability.
Many electronic control units are equipped onto a vehicle, an ...
Categories
- Manuals Home
- Nissan Versa Owners Manual
- Nissan Versa Service Manual
- Video Guides
- Questions & Answers
- External Resources
- Latest Updates
- Most Popular
- Sitemap
- Search the site
- Privacy Policy
- Contact Us

0.0063