
Nissan Versa (N17): Oil filter
OIL FILTER : Removal and Installation
REMOVAL
1. Remove engine under cover. Refer to EXT "Removal and Installation".
2. Drain engine oil. Refer to MA "ENGINE OIL : Draining".
3. Remove oil filter using Tool (A).
Front
Tool number : KV10115801 (J-38956)
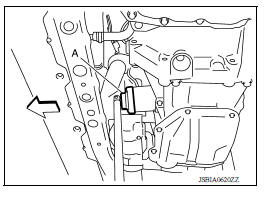
WARNING: Be careful not to get burned; engine and engine oil may be hot.
CAUTION:
- When removing, prepare a shop cloth to absorb engine oil leaks and spills.
- Do not spill engine oil on drive belt.
- Completely wipe off any engine oil that spills on engine and vehicle.
- Oil filter is provided with relief valve. Use Genuine NISSAN oil filter or equivalent.
INSTALLATION
1. Remove foreign materials adhering to the oil filter installation surface.
2. Apply new engine oil to the oil seal contact surface of new oil filter.
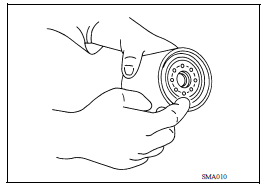
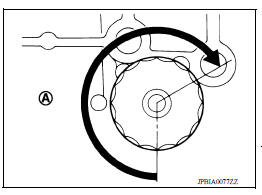
3. Screw oil filter manually until it touches the installation surface, then tighten it by 2/3 turn (A), or tighten to specification.
Oil filter : 17.7 N*m (1.8 kg-m, 13 ft-lb)
4. Refill engine with new engine oil. Refer to MA "ENGINE OIL : Refilling".
5. Install engine under cover. Refer to EXT "Removal and Installation".
OIL FILTER : Inspection
INSPECTION AFTER INSTALLATION
1. Check the engine oil level. Refer to MA "ENGINE OIL : Inspection".
2. Start the engine and ensure there are no engine oil leaks.
3. Stop the engine and wait for 10 minutes.
4. Check the engine oil level and adjust as necessary. Refer to MA "ENGINE OIL : Inspection".
 Engine oil
ENGINE OIL : Inspection ENGINE OIL LEVEL 1. Park vehicle on a level surface, wait 10 minutes before checking the engine oil level. 2. Pull out oil level gauge and wipe it clean. 3. Insert oil le ...
Spark plug
SPARK PLUG : Exploded View 1. Ignition coil 2. Spark plug SPARK PLUG : Removal and Installation REMOVAL 1. Remove ignition coil. Refer to EM "Removal and Installation". CAUTION: ...
Other materials:
Outside handle
OUTSIDE HANDLE : Removal and Installation
REMOVAL
1. Fully close the front door glass.
2. Remove front door finisher. Refer to INT "Removal and Installation".
3. Remove sealing screen.
NOTE:
Cut the butyl tape so that some parts of the butyl tape remain on the sealing
screen, if ...
Diagnosis and repair workflow
Work Flow
OVERALL SEQUENCE
DETAILED FLOW
1.GET INFORMATION FOR SYMPTOM
Get detailed information from the customer about the symptom (the condition
and the environment when the
incident/malfunction occurred).
>> GO TO 2.
2.CONFIRM THE SYMPTOM
Try to confirm the symptom described ...
Categories
- Manuals Home
- Nissan Versa Owners Manual
- Nissan Versa Service Manual
- Video Guides
- Questions & Answers
- External Resources
- Latest Updates
- Most Popular
- Sitemap
- Search the site
- Privacy Policy
- Contact Us

0.0148