Nissan Versa (N17): Outside handle
OUTSIDE HANDLE : Removal and Installation
REMOVAL
1. Fully close rear door glass.
2. Remove rear door finisher. Refer to INT "Removal and Installation".
3. Remove sealing screen.
NOTE: Cut the butyl tape so that some parts of the butyl tape remain on the sealing screen, if the sealing screen is reused.
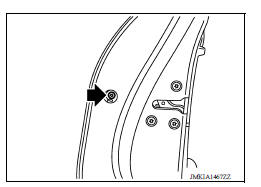
4. Remove door side grommet, and loosen bolt from grommet hole.
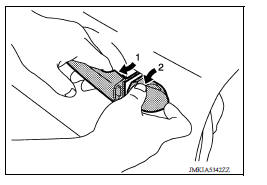
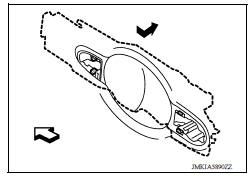
5. While pulling outside handle, remove outside handle escutcheon.
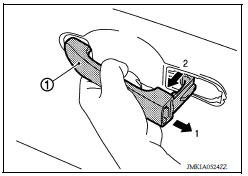
6. Pull outside handle (1) rearward and outward to remove.
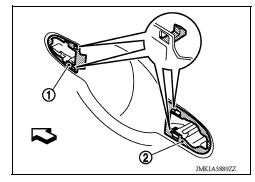
7. Remove front gasket (1) and rear gasket (2).
 : Front
8. Slide outside handle bracket toward rear of vehicle to remove.
 : Front
9. Disconnect outside handle cable (1) from outside handle bracket (2) as shown.

INSTALLATION
Installation is in the reverse order of removal.
CAUTION:
- After installation, check door open/close, lock/unlock operation.
- Check door lock cable is properly engaged with outside handle bracket.
TRUNK LID LOCK
Exploded View
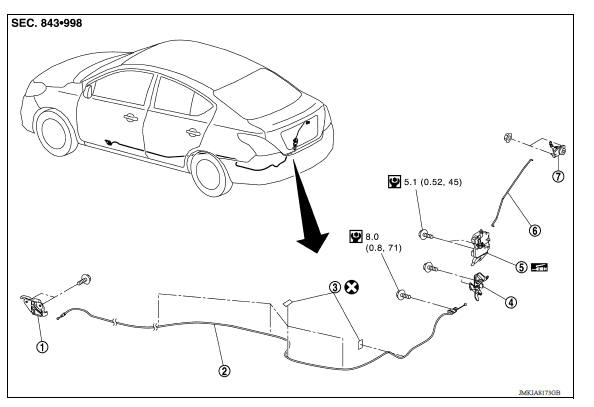
1. Trunk lid opener handle 2. Trunk lid opener cable 3. Cable protector 4. Trunk lid striker 5. Trunk lid lock assembly 6. Key rod 7. Trunk key cylinder
 Inside handle
INSIDE HANDLE : Removal and Installation REMOVAL 1. Remove rear door finisher. Refer to INT "Removal and Installation". 2. Remove upper side of sealing screen. NOTE: Cut the butyl tape ...
Trunk lid lock
TRUNK LID LOCK : Removal and Installation REMOVAL 1. Remove trunk lid finisher (if equipped). Refer to INT "Removal and Installation". 2. Release rod holder (1) by lifting upward, and ...
Other materials:
Jump starting
To start your engine with a booster battery, the
instructions and precautions below must be followed.
WARNING
If done incorrectly, jump starting can
lead to a battery explosion, resulting in
severe injury or death. It could also
damage your vehicle.
Explosive hydrogen gas is always pre ...
Preparation
Special Service Tools
The actual shapes of KentMoore tools may differ from those of special
service tools illustrated here.
Tool number
(KentMoore No.)
Tool name
Description
KV10111100
(J37228)
Seal cutter
Removing oil pan (lower and upper) etc.
...
Categories
- Manuals Home
- Nissan Versa Owners Manual
- Nissan Versa Service Manual
- Video Guides
- Questions & Answers
- External Resources
- Latest Updates
- Most Popular
- Sitemap
- Search the site
- Privacy Policy
- Contact Us

0.0076