Nissan Versa (N17): Outside handle
OUTSIDE HANDLE : Removal and Installation
REMOVAL
1. Fully close rear door glass.
2. Remove rear door finisher. Refer to INT "Removal and Installation".
3. Remove sealing screen.
NOTE: Cut the butyl tape so that some parts of the butyl tape remain on the sealing screen, if the sealing screen is reused.
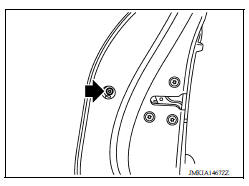
4. Remove door side grommet, and loosen bolt from grommet hole.
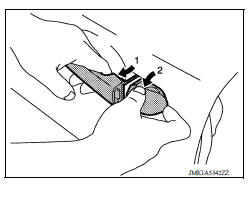
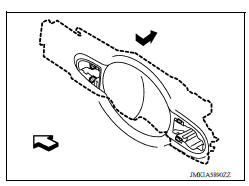
5. While pulling outside handle, remove outside handle escutcheon.
6. Pull outside handle (1) rearward and outward to remove.
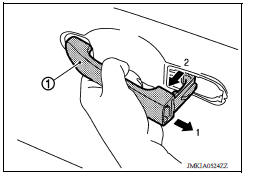
7. Remove front gasket (1) and rear gasket (2).
 Front
Front
8. Slide outside handle bracket toward rear of vehicle to remove.
 Front
Front
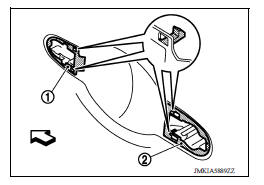
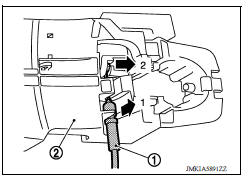
9. Disconnect outside handle cable (1) from outside handle bracket (2) as shown.
INSTALLATION
Installation is in the reverse order of removal.
CAUTION:
- After installation, check door open/close, lock/unlock operation.
- Check door lock cable is properly engaged with outside handle bracket.
TRUNK LID LOCK
Exploded View
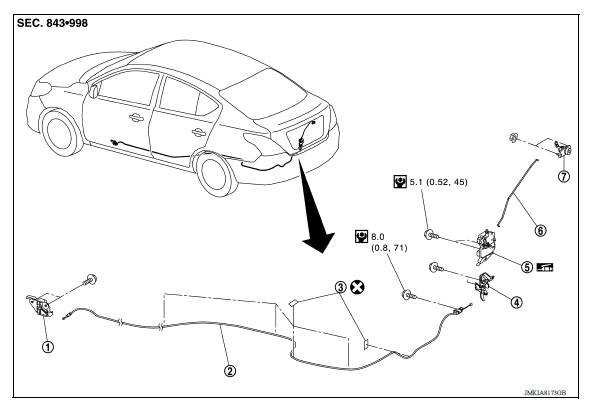
1. Trunk lid opener handle 2. Trunk lid opener cable 3. Cable protector 4. Trunk lid striker 5. Trunk lid lock assembly 6. Key rod 7. Trunk key cylinder
 Inside handle
INSIDE HANDLE : Removal and Installation REMOVAL 1. Remove rear door finisher. Refer to INT "Removal and Installation". 2. Remove upper side of sealing screen. NOTE: Cut the butyl tape ...
Trunk lid lock
TRUNK LID LOCK : Removal and Installation REMOVAL 1. Remove trunk lid finisher (If equipped). Refer to INT "Removal and Installation". 2. Disengage rod holder (1) by lifting upward, and ...
Other materials:
Drive belt
1. Water pump pulley
2. Generator pulley
3. Manual tensioner pulley
4. Air conditioner compressor pulley
5. Crankshaft pulley
WARNING
Be sure the ignition switch is placed in the
OFF or LOCK position before servicing
drive belt. The engine could rotate
unexpectedly.
1. Visually inspect t ...
Differential side oil seal
Exploded View
1. Transaxle assembly 2. Differential side oil seal (left side) 3.
Differential side oil seal (right side)
Front Genuine
NISSAN Matic S ATF
Removal and Installation
NOTE:
When removing components such as hoses, tubes/lines, etc., cap or plug openings
to prevent fluid fr ...
Categories
- Manuals Home
- Nissan Versa Owners Manual
- Nissan Versa Service Manual
- Video Guides
- Questions & Answers
- External Resources
- Latest Updates
- Most Popular
- Sitemap
- Search the site
- Privacy Policy
- Contact Us

0.0051