Nissan Versa (N17): Rear door finisher
Exploded View
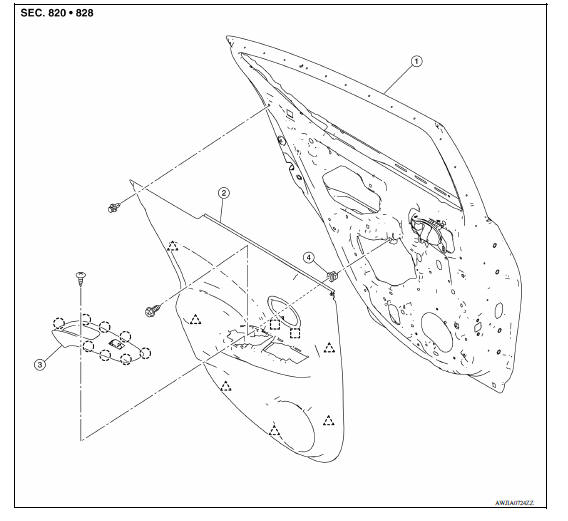
1. Rear door panel 2. Rear door finisher 3. Rear power window switch finisher
(if
equipped)
4. Grommet  Clip
Clip
 Metal clip
 Pawl
Pawl
Removal and Installation
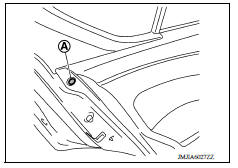
REMOVAL
- Fully open rear door window.
- Remove rear door finisher clip (A).
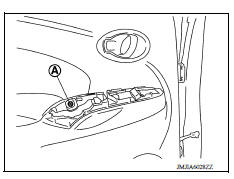
- Remove rear power window switch and finisher as an assembly (if equipped). Refer to PWC "Removal and Installation".
- Remove rear door finisher.
a. Remove rear door finisher bolt (A).
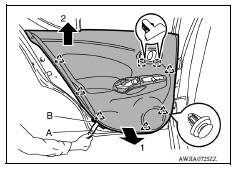
b. Release rear door finisher clips and metal clips using a suitable tool (A) and remove rear door finisher as shown.
 : Clip
 : Metal clip
CAUTION: Apply protective tape (B) on the door panel and/or door finisher to protect from damage.
INSTALLATION
Installation is in the reverse order of removal.
CAUTION: When installing rear door finisher, make sure the clips and metal clips are securely pressed into door panel holes.
BODY SIDE TRIM
Exploded View
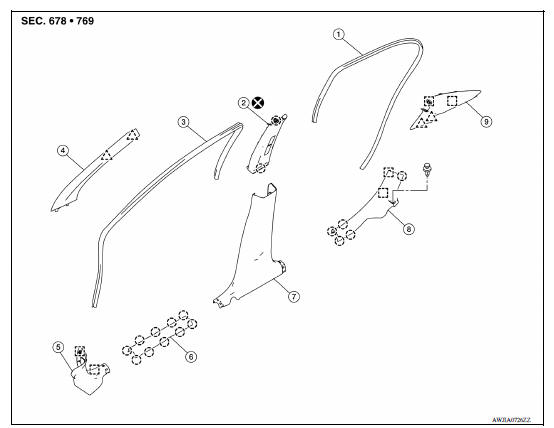
1. Rear body side welt 2. Center pillar upper finisher 3. Front body side
welt
4. Front pillar finisher 5. Dash side finisher 6. Front kicking plate
7. Center pillar lower finisher 8. Rear kicking plate 9. Rear pillar finisher
Clip
Pawl
Metal clip
 Front door finisher
Exploded View 1. Front door panel 2. Front door finisher 3. Main power window and door lock/ unlock switch finisher (if equipped) 4. Front door corner finisher 5. Grommet Metal clip Clip ...
Front pillar finisher
FRONT PILLAR FINISHER : Removal and Installation REMOVAL Release front pillar portion of front body side welt. Pull front pillar finisher downward as shown, using mild pressure to disengage t ...
Other materials:
Intake manifold
Exploded View
1. EVAP canister purge volume control
solenoid valve
2. Hose clamp 3. Vacuum hose
4. PCV hose 5. Hose clamp 6. Intake manifold support
7. Gasket 8. Intake manifold 9. Electric throttle control actuator
10. Gasket 11. EVAP service port
A. To air duct B. To centralized underf ...
Accelerator pedal released position
learning
Description
Accelerator Pedal Released Position Learning is a function of ECM to learn
the fully released position of the
accelerator pedal by monitoring the accelerator pedal position sensor output
signal. It must be performed each
time harness connector of accelerator pedal position senso ...
Categories
- Manuals Home
- Nissan Versa Owners Manual
- Nissan Versa Service Manual
- Video Guides
- Questions & Answers
- External Resources
- Latest Updates
- Most Popular
- Sitemap
- Search the site
- Privacy Policy
- Contact Us

0.0053