Nissan Versa (N17): Power outlets
Instrument panel

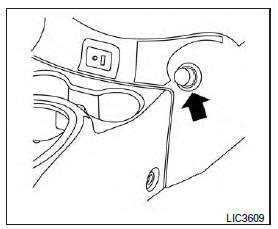
Console (if so equipped)
The power outlets are for powering electrical accessories such as cellular telephones. The outlets are rated at 12 volt, 120W (10A) maximum.
CAUTION
The outlet and plug may be hot during or immediately after use.
- Only certain power outlets are designed for use with a cigarette lighter unit. Do not use any other power outlet for an accessory lighter. It is recommended that you visit a NISSAN dealer for additional information
- Do not use with accessories that exceed a 12 volt, 120W (10A) power draw.
- Do not use double adapters or more than one electrical accessory.
- Use power outlets with the engine running to avoid discharging the vehicle battery.
- Avoid using power outlets when the air conditioner, headlights or rear window defroster is on.
- Before inserting or disconnecting a plug, be sure the electrical accessory being used is turned off.
- Push the plug in as far as it will go. If good contact is not made, the plug may overheat or the internal temperature fuse may open.
- When not in use, be sure to close the cap. Do not allow water or any other liquid to contact the outlet.
 Vehicle Dynamic Control (VDC) off switch
The vehicle should be driven with the VDC system on for most driving conditions. If the vehicle is stuck in mud or snow, the VDC system reduces the engine output to reduce wheel spin. The en ...
Storage
Front-door pockets ...
Other materials:
Sun visors
1. To block glare from the front, swing down
the sun visor 1 .
2. To block glare from the side, remove the sun
visor from the center mount and swing the
visor to the side 2 .
3. Slide the extension 3 sun visor in or out as
needed.
CAUTION
Do not store the sun visor before returning
...
Mixture ratio selflearning value
clear
Description
This describes how to erase the mixture ratio selflearning value. For the
actual procedure, follow the instructions
in "Diagnosis Procedure".
Work Procedure
1.START
With CONSULT
Start engine and warm it up to normal operating temperature.
Select "SELFLEARNING CONT" in "WOR ...
Categories
- Manuals Home
- Nissan Versa Owners Manual
- Nissan Versa Service Manual
- Video Guides
- Questions & Answers
- External Resources
- Latest Updates
- Most Popular
- Sitemap
- Search the site
- Privacy Policy
- Contact Us

0.0049