Nissan Versa (N17): Rear door glass
Exploded View
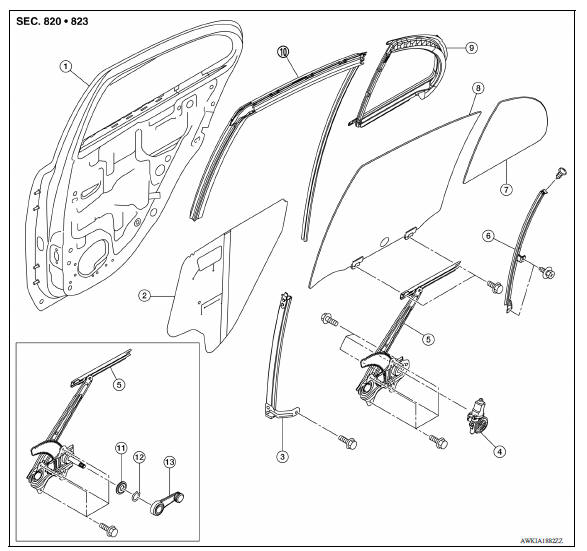
1. Rear door panel 2. Sealing screen 3. Rear door sash 4. Power window motor 5. Regulator assembly 6. Partition sash 7. Partition glass 8. Rear door glass 9. Partition weather-strip 10. Rear door glass run 11. Regulator seal (manual window) 12. Retaining clip (manual window) 13. Regulator handle (manual window)
Removal and Installation
REMOVAL
1. Fully open rear door glass.
2. Remove rear door finisher. Refer to INT "Removal and Installation".
3. Disconnect harness connector from rear door speaker.
4. Remove rear door sealing screen.
NOTE: Cut the butyl-tape so that some parts of the butyl-tape will remain on the sealing screen, if the sealing screen is reused.
5. Remove partition sash bolts and screw.
6. Remove partition sash.
- Remove rear door glass run from partition sash.
- Pull partition sash slightly and straight down.
- From the upper side, slope partition sash toward the vehicle and then remove.
7. Operate the rear power window main switch or regulator handle (manual) to raise or lower the door window until the glass bolts (A) can be seen.
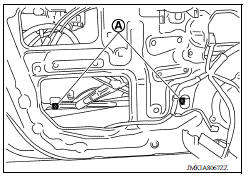
8. Remove rear door glass bolts.
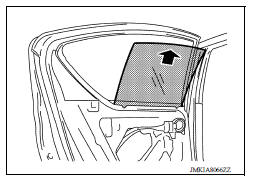
9. Carefully pulling inward to remove the rear door glass.
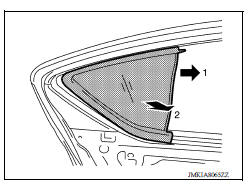
10. Remove partition glass.
1. Slide partition glass toward the direction of arrow 1.
2. Pull partition glass toward the direction of arrow 2 to remove.
3. Remove partition weather strip from the partition glass.
INSTALLATION
Installation is in the reverse order of removal.
Inspection and Adjustment
FITTING INSPECTION
- Check that the glass fits securely into the sash groove.
- Lower the glass slightly [approximately 10 to 20 mm (0.394 to 0.787 in)], and check that the clearance to the sash is parallel. Loosen the regulator bolts, guide rail bolts, and glass and guide rail bolts to correct the glass position if the clearance between the glass and sash is not parallel.
 Front regulator
Exploded View 1. Front door panel 2. Front door lower sash (front) 3. Front door glass run 4. Front door sealing screen 5. Front door power window motor 6. Front door regulator 7. Front door ...
Rear regulator
Exploded View 1. Rear door panel 2. Sealing screen 3. Rear door sash 4. Rear power window motor 5. Regulator assembly 6. Partition sash 7. Partition glass 8. Rear door glass 9. Partition weathe ...
Other materials:
Recommended fluids/lubricants and capacities
The following are approximate capacities. The actual refill capacities may
be a little different. When refilling, follow the procedure
described in the "Do-it-yourself" section to determine the proper refill
capacity.
...
Oil pump
Exploded View
1. Rear oil seal 2. Oring 3. Oil pan (upper)
4. Oil pump chain tensioner (for oil
pump drive chain)
5. Oil pump drive chain 6. Crankshaft key
7. Crankshaft sprocket 8. Oil pump sprocket 9. Oil pump
10. Oring 11. Oring 12. Oil pan drain plug
13. Drain plug washer 14. Oil pan ( ...
Categories
- Manuals Home
- Nissan Versa Owners Manual
- Nissan Versa Service Manual
- Video Guides
- Questions & Answers
- External Resources
- Latest Updates
- Most Popular
- Sitemap
- Search the site
- Privacy Policy
- Contact Us

0.0049